


Ever wish your everyday photos looked like they belonged in a frame—or, dare I say, a magazine?
Yep. Same.
Hey Gem, I’m Ruby, and today we’re diving into one of the most underrated (and totally magical) iPhone camera features: Portrait Mode.
Most people think it’s just for selfies or the occasional dog pic. But when you actually know how to use it… that’s when your photos start looking chef’s kiss professional. Think: crisp subject, dreamy background blur, and zero fancy gear required.
Let’s break it down.
What Is Portrait Mode, Anyway?
In short: it’s your iPhone’s way of pretending to be a fancy DSLR.
It gives you that soft, blurred background (called shallow depth of field) that makes your subject pop, just like the pros do. Whether you’re snapping a photo of your kid, your coffee, or your freshly groomed dog, portrait mode is that girl.
When to Use It (And When to Skip It)
Let’s set you up for success, shall we?
Use Portrait Mode when:
- The lighting is good (natural light is your BFF).
- Your subject is still. Think calm toddler, lounging dog, or a beautiful still moment.
- There’s space between your subject and the background. Don’t squish your kiddo against the wall, let that background melt like butter.
Skip Portrait Mode when:
- You’re at a soccer game or recital and everything’s moving a mile a minute.
- It’s too dark (it’ll just make things look fuzzy in a bad way).
- Your subject is too close to the background or you’re standing too close. Trust your camera when it tells you to “move farther away.” It’s not being rude. Promise.
Little Pro Tip from a Busy Mom
You might hear people say, “Keep your background clean!” but… I’m a mom. My background usually has toys, laundry, or yesterday’s snack involved.
Portrait mode is perfect for making the mess magically disappear. Blur it right out of focus.
Bonus Hack: Live Photos + Portrait Mode = Magic Combo
If you’ve watched my video on Live Mode (if not, go watch it next!), here’s a fun tip:
You can take a photo in Live Mode and then turn it into a Portrait Mode image after. So if you snap a cute shot and realize you forgot to switch to Portrait Mode, don’t worry, you’ve still got options!
Want My Go-To iPhone Camera Settings?
If you’ve ever wondered, “Okay, but what settings should I use?” I got you.
I created a free iPhone camera settings cheat sheet that walks you through exactly what I use to get beautiful, dreamy photos on the go. It’s quick, clear, and made for moms like us.
Final Thoughts: You Don’t Need a Fancy Camera
You really don’t. Just a little know-how, some decent lighting, and Portrait Mode can make all the difference.
So next time your kid is sitting still and the light’s hitting just right, grab your phone, open the camera, switch to Portrait Mode, and snap. You’ll be amazed at the difference.
Oh, and if this helped, I’d love it if you’d share it with a friend (or five).
Let’s have everyone taking gorgeous iPhone pics without the overwhelm.
Until next time! Get out there and take beautiful photos.
You’ve got this.
Want to watch me walk through all of this step-by-step?
Check out the full tutorial on my YouTube channel (or down below) and don’t forget to subscribe while you’re there!
PUT A PIN ON IT!
Ever snapped a photo only to catch a mid-blink or a split-second after the giggle? If you’re a mom, you know how quickly those sweet little moments come and go. That’s exactly why you need to start using iPhone Live Mode. Live Mode quietly captures a few extra seconds before and after you press the […]

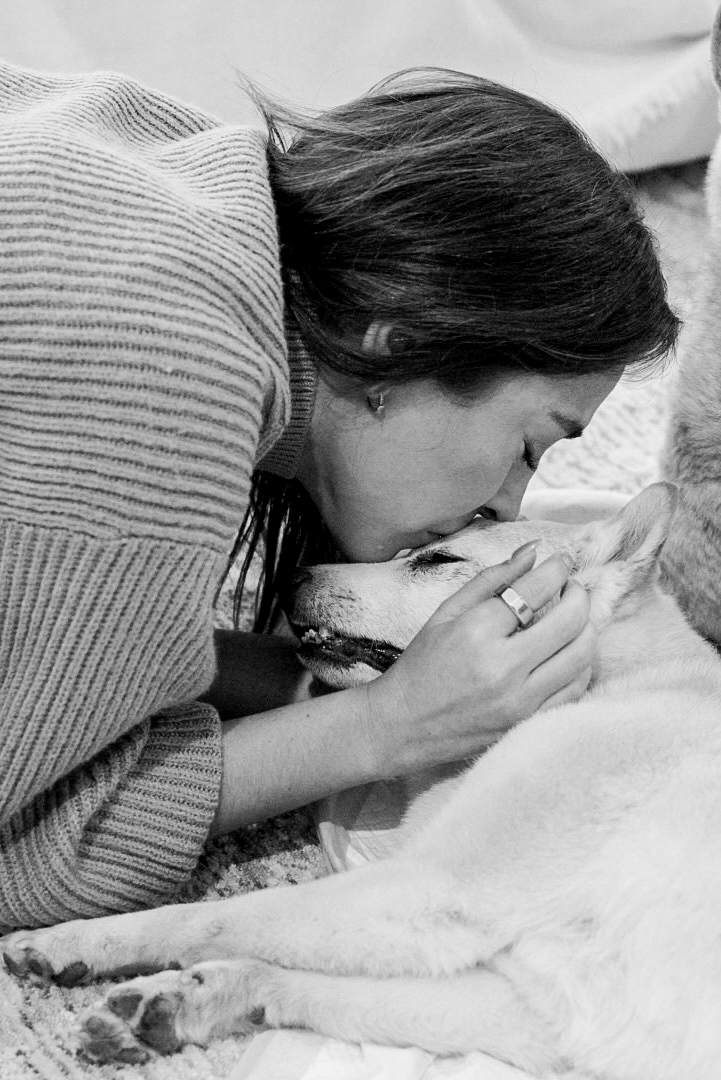
If you’ve ever had a dog, you know they’re more than just pets—they’re family. They see you at your best and your worst and love you through it all. That was my sweet Chipis, my stubborn, adventurous, and fiercely loyal Shiba Inu. Saying goodbye to her this past month was one of the hardest things […]
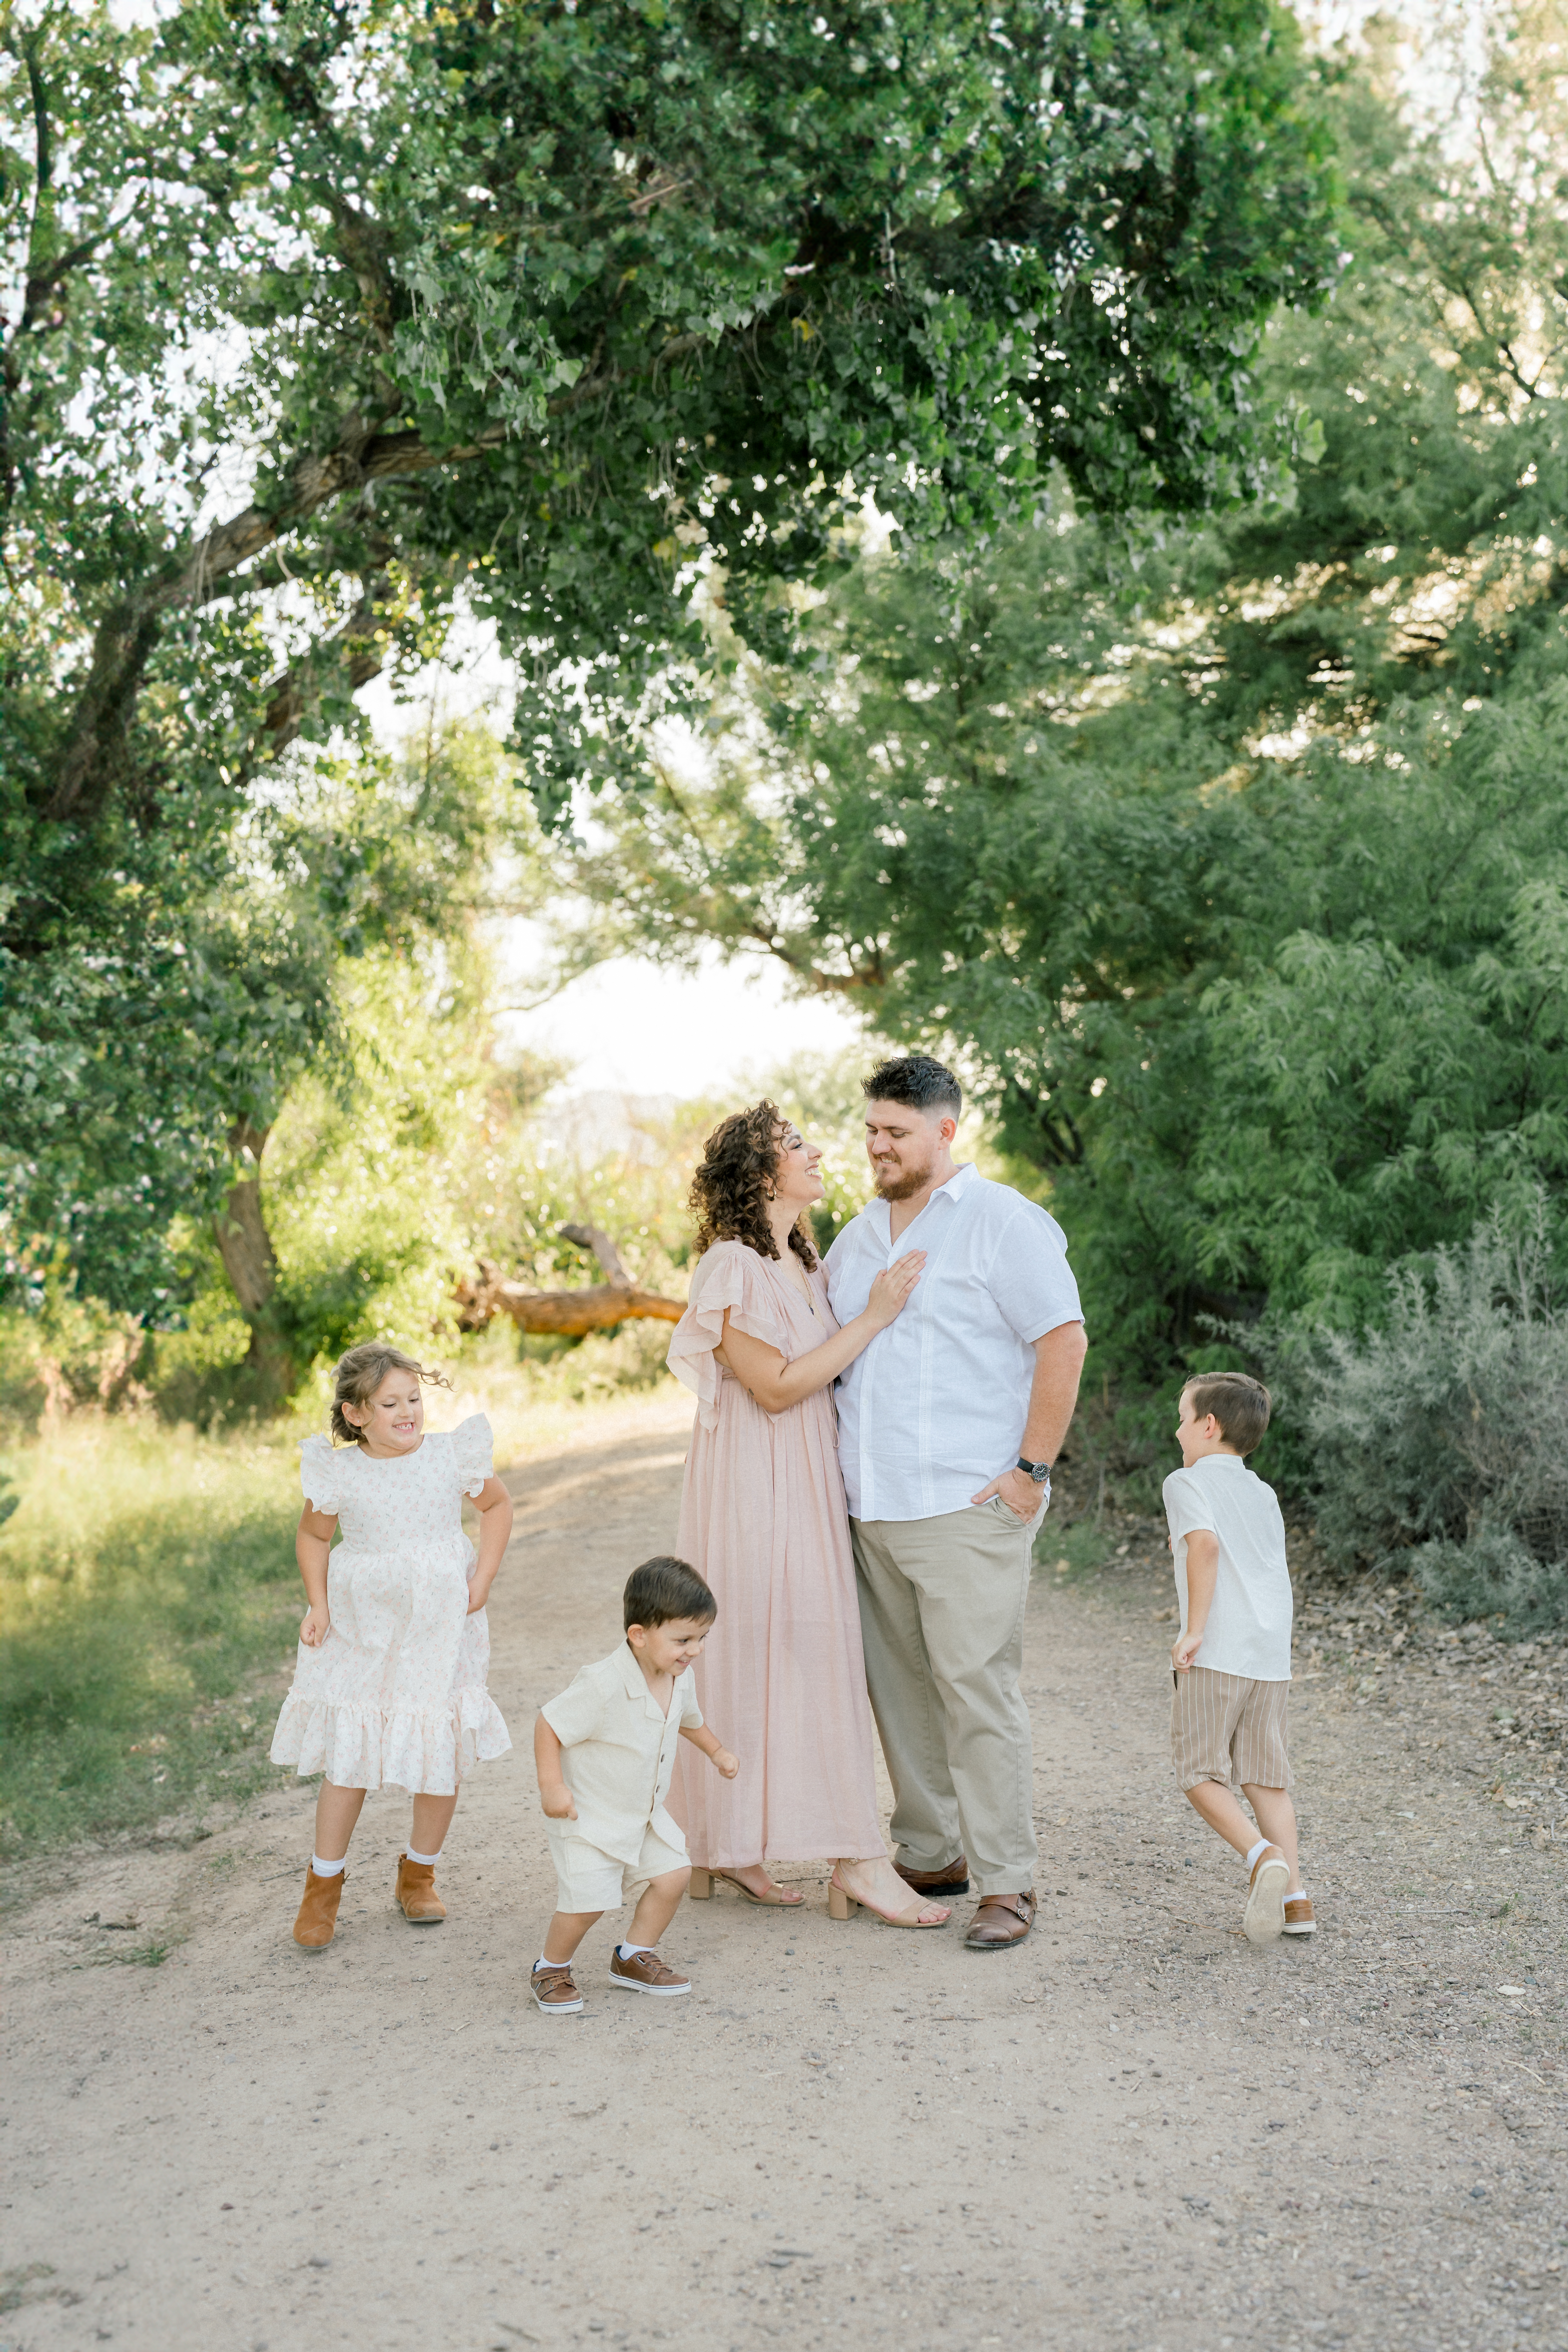
During a vibrant photo session at Sweetwater Wetlands Park, the Latorre family, including twins and a younger brother, embraced the outdoors, allowing their natural interactions to shine through in every capture. The park’s lush scenery and serene atmosphere paired with the family’s soft-toned outfits offered a perfect setting. Despite some challenges with sunlight, the photographer’s skill ensured beautiful results, capturing genuine, joyful moments that the family will cherish as memories.
entries
popular
view the highlights


Site Credits
©2018 - 2025, RUBY SANDOVAl photography LLC | ALL RIGHTS RESERVED | TERMS & CONDITIONS | PRIVACY POLICY